Useful resources to help you make the most of our partnership, including our webinars and social media resources
Step 1: Log in to your Partner Area via www.muchloved.com
Click 'Login' at the top right of the screen, add your email address and password and click 'Login'.
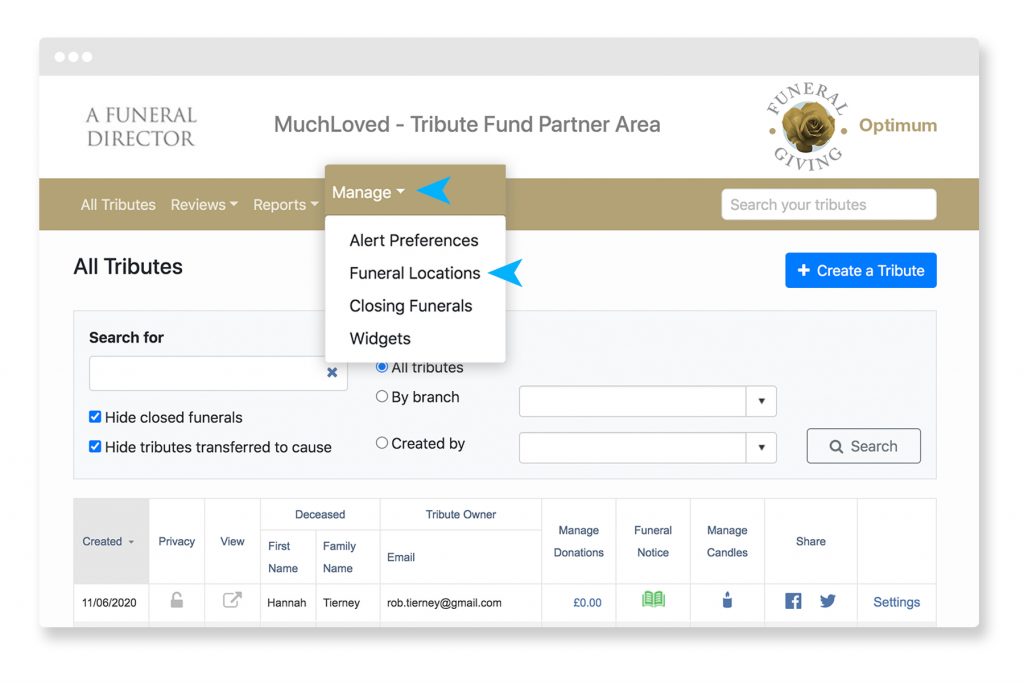
Step 2: Once in your Partner Area click on the 'Manage' tab along the top and then again on 'Funeral Locations'.
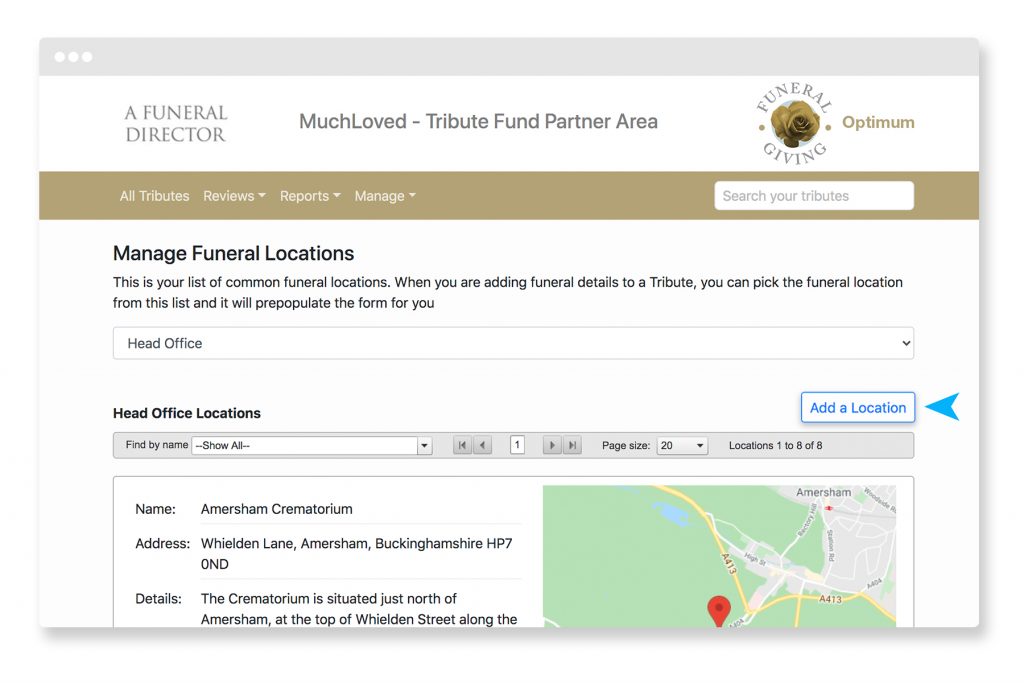
Step 3: Click 'Add a Location'.
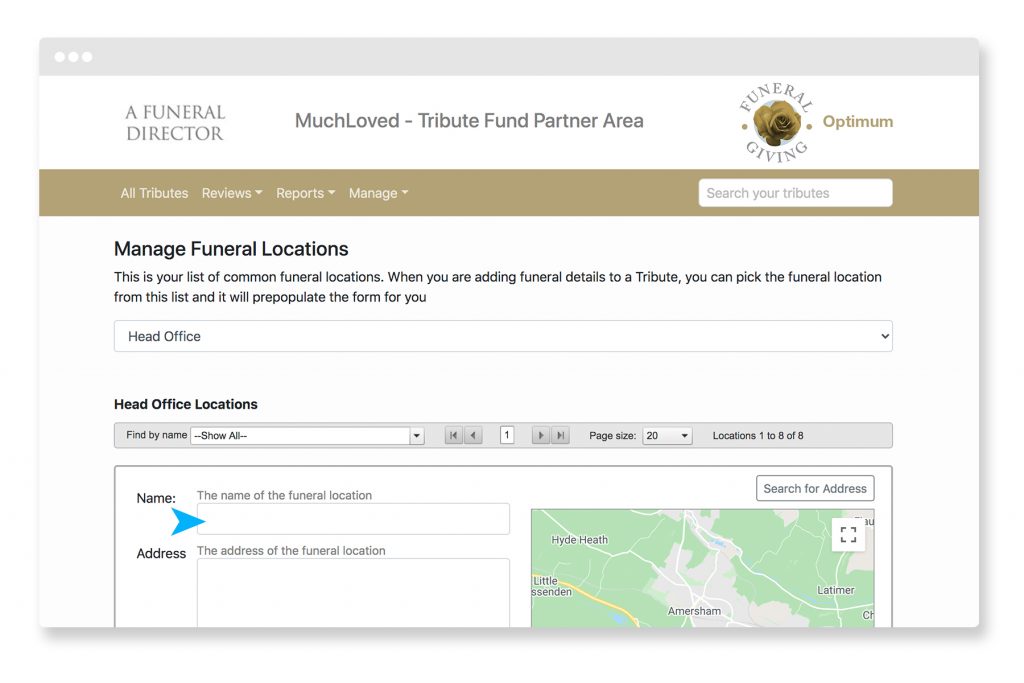
Step 4: Enter your details and click 'Add Location'.
Now that you've added the location to your list of default locations, you will be able to select it when you add the service details or committal details to a funeral notice.
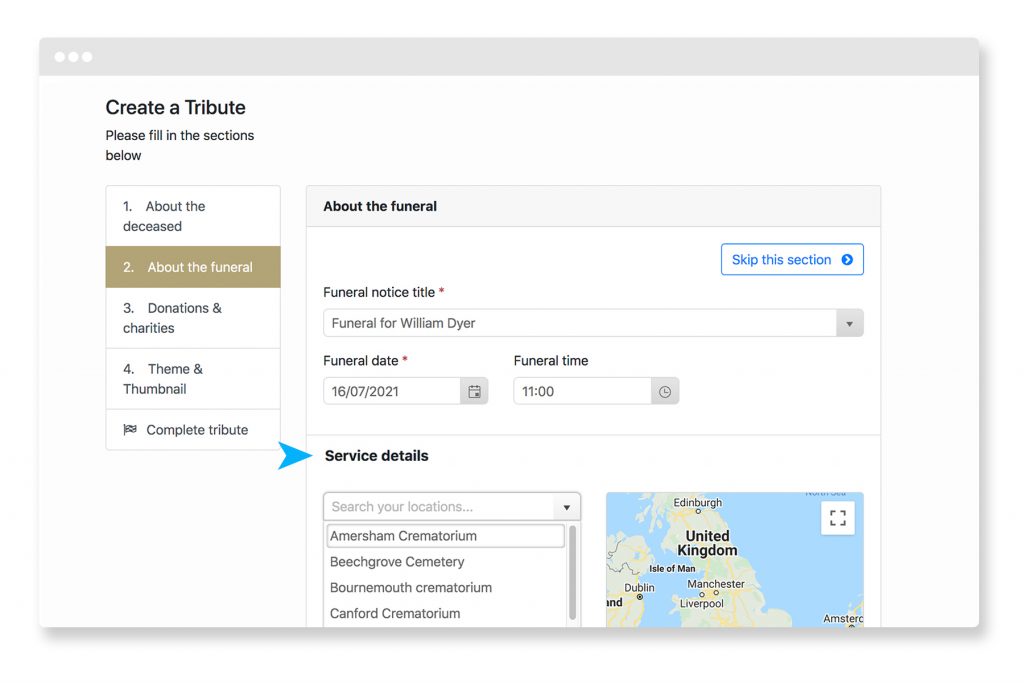
If you are logged in with a branch login you will see the funeral locations that have been set up for your branch in the 'Search your locations...' dropdown list when you add a service or committal. And if you add a funeral location it will be added to the list of locations for your branch.
If your login is not tied to a branch (e.g. Head Office) then you can add and edit address details to the Head Office custom locations and also the custom locations of your branches.
Useful resources to help you make the most of our partnership, including our webinars and social media resources
A series of helpful videos with everything you need to know to get started using MuchLoved
Guides on making the most of MuchLoved, from adding funeral locations to checking on charitable donations
How to introduce MuchLoved to the families you work with
Meet the members of our dedicated and enthusiastic support team, who are always on hand to help you with any queries
Bonus free features and services that we provide for you, automatically included with your partnership package
Find out more about us, who we are and how we started
How to integrate our services into your website
Frequently asked questions and top tips to help you make the most of our service